

Sending pictures using email is probably one of the easiest ways of transferring essential files, family memories, commercial documents, or even professional pictures.
Many users encounter difficulties when attaching good quality photos due to their size. You may receive messages stating that it is impossible to upload the attachment, the message is too big to be sent, or the picture exceeds the limit set by your service.Therefore, it will become necessary to learn how to compress pictures for email. By compressing the picture, you reduce its size and keep the photo of sufficient quality for the recipient. No matter whether you are sending pictures of products to your customers, project files to your clients, or just family pictures, optimizing your images makes everything easier.
Many people are trying to find out how to make pictures smaller for emails because modern cell phones and digital cameras take very high resolution pictures which look great but consist of millions of pixels, and the size of such images is much bigger than needed.
Knowing how to resize pictures for emails allows controlling the size and dimension of your image and making sure that there will be no problem with sending it.
Why Do You Need to Compress Pictures for Email?
The images captured using contemporary cameras and cell phones tend to be much bigger than that required by email service providers. A single image file can be several megabytes big, and this could cause trouble when one is trying to send multiple files.
Compression of the images is important for making the sharing process more efficient. It makes the uploading process easier and ensures that no complications occur with attachment.
Email Attachment Size Limits
Most email providers have limits on how large an attachment can be. For example, sending several high-resolution images together may exceed the maximum allowed size.
A large image file can cause:
- Slow uploading time.
- Failed email delivery.
- Problems downloading attachments.
- Limited space in your email storage.
By learning how to compress a picture for email, you can reduce file size and avoid these common problems.
Compression is especially important for businesses that regularly send images to customers, designers, or clients. Product photos, marketing materials, and project images often need to be shared quickly without creating unnecessary delays.
Faster Sending and Receiving
Large image attachments take longer to upload and download. This can become frustrating when using slower internet connections or mobile devices.
Smaller images improve the email experience because they:
- Upload faster.
- Download quickly.
- Open easily on mobile devices.
- Require less internet data.
For professional communication, faster file sharing creates a smoother workflow and helps avoid unnecessary waiting times.
For example, a photographer may need to send sample images to a client, or an online seller may need to share product pictures with a supplier. Reducing image size makes these tasks much easier.
Better Storage Management
If you send and receive large size images in your emails on a regular basis, it will not be long before your inbox becomes full. Storing all these attachments in their original high resolution form wastes space.
By compressing these images in order to send them through email, you save space by avoiding the limit of the storage capacity very soon.
This proves particularly useful for businesses which have to deal with a lot of images every month.
What Happens When a Picture Is Too Large for Email?
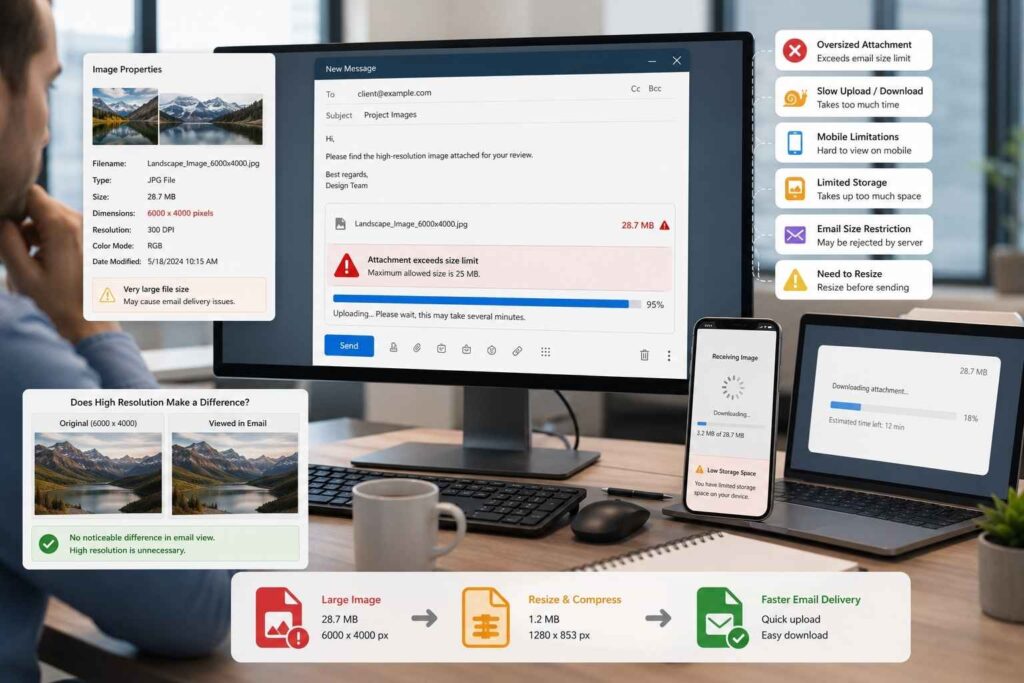
Several issues may arise when the size of the image attachment is large. You might be denied by the email provider the chance to attach the file, or the procedure becomes very slow.
Large images could also pose problems to the recipient. Some people have limited storage space or low-speed internet, and hence they have problems downloading the large attachments.
The other problem is the fact that large resolution pictures have more details than the one required for the viewing of the pictures in emails. People open their emails in the computer or smartphone, whereby the huge resolution pictures will not make much difference.
Therefore, the need to learn how to resize images in emails becomes crucial.
Understanding Image Compression
Image compression is the process of reducing the size of an image file. It works by removing unnecessary data while trying to preserve important visual details.
There are two main types of image compression:
Lossless Compression
The lossless compression method ensures that the file size will be reduced without losing image data. The image quality will remain the same, though the size decrease will be smaller than before.
It is effective in situations where image quality is vital.
Lossy Compression
Lossy compression decreases the file size by eliminating certain information from the picture, which the human eye cannot see very well. Lossy compression generates significantly smaller files without sacrificing quality.
In emails, lossy compression is often utilized as it represents an optimal compromise between the file size and its appearance.
Here lies the core of the problem: the right compression level must be selected. In case of excessive compression, pictures appear blurred, and insufficient compression does not decrease their size sufficiently.
How to Compress a Picture for Email: Basic Methods
There are several ways to reduce image size before sending it through email. The best method depends on the number of images, required quality, and the device you are using.
Reduce Image Dimensions
Image size can be minimized using a number of ways including reducing its dimensions.
An image taken using a modern cell phone may be thousands of pixels in width, but the email recipient does not need it that wide.
This will result in reduction in the number of pixels, hence minimization in the image size.
This technique may be used if one wishes to minimize picture size for emails.
Compress the Image File
The other approach is by utilizing the compression software that minimizes the data storage within the image file.
Most of the image editing software and web-based tools provide options for adjusting the level of compression prior to saving the file.
A good compression level generally produces great results since the file size is reduced without any loss of image quality.
How to Make Photos Smaller for Email Without Losing Quality
It is believed that shrinking an image results in loss of quality. But this is not always the case, as long as the right process of resizing the image is employed. The most important thing is getting rid of excessive file size while keeping enough details so that the image appears clearly when viewed by the recipient.
It is important to know how to shrink photos for emails, especially when sending more than one photo at a time. Rather than using large-sized files that will take ages to upload, the right thing is creating optimal images that are easy to share.
The right way is reducing the size of the image, use of the right file format, and proper compression. Photos do not have to be very pixelated in order to appear well on an email screen.
Resize Images Before Sending
It is very easy to make images smaller by resizing them before attaching them to emails.
Images captured by high-resolution smartphones and digital cameras often come with too many pixels. Although more pixels help in making professional quality prints, they may not be necessary when the intention is to share the picture via an email.
By resizing images for email purposes, one will make the picture smaller in terms of width and height.
For instance, large camera pictures may have a dimension of 6000 × 4000 pixels. When resized to make them smaller and appropriate for emailing, there will be a great reduction in the attachment size without compromising on the picture quality.
The main thing to consider when resizing images for emails is that the original proportions of the picture should be maintained.
Choose the Right Compression Level
Compression is an important part of reducing image size. However, using too much compression can damage image quality.
A good compression level removes unnecessary data while keeping important details visible.
When preparing images for email, focus on:
- Keeping text and important details clear.
- Avoiding excessive quality reduction.
- Checking the final image before sending.
- Choosing the right balance between size and quality.
The ideal compression level depends on the purpose of the image. A personal photo may allow more compression, while a professional product image may require better quality.
How to Resize Pictures for Email
There are several ways to resize pictures for email depending on the device and software available. You can use image editing software, built-in computer tools, or online image compressors.
Using Image Editing Software
Professional editing programs provide complete control over image size and quality.
With an image editor, you can adjust:
- Image width and height.
- Resolution settings.
- File format.
- Compression level.
This method is useful for photographers, designers, and businesses that need consistent image quality.
For example, before sending product images to customers, reducing unnecessary dimensions can make attachments easier to download while keeping the products clearly visible.
Using Built-in Computer Tools
In addition to this, most computers have built-in features that enable users to resize their images without downloading any other programs.
This is particularly important for situations where an individual only needs to make some adjustments on a handful of pictures to send via emails.
This enables one to edit their images into smaller sizes without altering the original file. It is always advised to save the new resized copy separate from the original.
Using Online Image Compression Tools
Web-based compression applications are fast solutions whenever you require the immediate reduction of your image.
This kind of application will let you upload your image file, compress it according to your preferred settings, and then download the new image. Web compression applications are beneficial especially if you lack editing software. It is however important to take into consideration the safety of the web-based compression application.
Best Image Formats for Email Attachments
Choosing the correct file format plays an important role when compressing images for email. Different formats have different advantages depending on the type of image.
JPEG Format
JPEG is one of the most commonly used formats for email images. It works especially well for photographs because it provides good quality with smaller file sizes.
Most camera photos are already saved as JPEG files, making them easy to compress and share.
PNG Format
PNG is useful for images that require transparency or sharp graphics, such as logos and illustrations.
However, PNG files are often larger than JPEG files, so they may not always be the best choice for email attachments.
WebP Format
WebP is an advanced image format that guarantees good quality with small files. WebP is commonly used on websites to increase loading speed.
Nevertheless, WebP may cause compatibility problems related to the recipient’s computer or email client.
The choice of appropriate format is essential in order to succeed in image compression for email.
Common Mistakes When Compressing Images for Email
Although compressing images is simple, some mistakes can affect quality or create unnecessary problems.
Reducing Quality Too Much
One common mistake is applying too much compression. This may create blurry images, unclear details, and visible distortion.
Always preview the compressed image before attaching it to your email.
Resizing Without Keeping Proportions
Changing image width and height separately can make photos look stretched or squeezed.
Always maintain the original aspect ratio when resizing.
Overwriting the Original Image
Never replace your original high-quality photo with a compressed version.
Keep the original file and create a separate copy for email sharing. This allows you to use the full-quality image later for printing or editing.
Sending Multiple Large Images Together
Sending many high-resolution images in a single email can quickly exceed attachment limits.
Instead, compress images individually or combine them into a smaller collection when necessary.
Tips for Sending Professional Images Through Email
Whether you are sending personal photos or business images, following a few simple practices can improve the overall experience.
Before sending images:
- Rename files clearly so recipients understand the content.
- Remove unnecessary images from the attachment.
- Check the final file size.
- Preview images before sending.
- Use compressed copies instead of original files.
For businesses, properly optimized images create a more professional impression. Customers and clients can open files faster without dealing with large downloads.
Learning how to resize pictures for email helps create a smoother communication process and prevents common attachment problems.
Advanced Tips to Compress Images for Email
Once you get to learn the basic procedure of compressing images, there are some advanced tricks that will help you to save space while still having the same image. Compressing images helps not only in saving space but also sharing the image more easily while still retaining all its features.
As you learn how to compress an image for emails, it is vital that you first know the requirements of each image. Personal, business presentation, or product images can require different settings during the compressing process.
To have best results when compressing images for emails, you should always keep the original image file and use the compressed one for emails.
Some useful practices include:
- Keep a backup of the original image.
- Avoid compressing the same file multiple times.
- Choose the correct dimensions before reducing quality.
- Preview the final image before sending.
- Use the right file format according to your requirement.
These simple steps help you create email attachments that are smaller, faster to send, and still visually appealing.
How to Maintain Image Quality After Compression
Loss of quality is a common issue when downsizing images. Nevertheless, quality downsizing and compression can lead to outstanding results.
The main idea is to find the optimal proportion of the two aspects. With excessive loss of quality, you might get a blurry image with compression signs. On the contrary, using too little compression might result in too high file size of the picture.
In case you downsize photos for email purposes, it is crucial to save the necessary image quality by cutting extra data.
As an example, imagine that you take a photo with a smartphone that consists of thousands of pixels. An image viewer from your e-mail subscriber will not require full resolution of the picture viewed through his laptop or smartphone. Thus, downsizing the image can help cut the file size drastically.
Selecting the right format is another useful method to ensure the picture quality. It would be best to choose JPEG in the case of photographs.
Why Image Dimensions Matter More Than File Size
Many people tend to concentrate on the image size rather than its dimensions when preparing photos for emails. A large image has more pixels, meaning that it contains more data. Although this information is beneficial for professional editing and printing of images, it is not necessary when it comes to emailing. If you know how to resize images for email, then you can make the picture smaller in terms of width and height before compressing. This will get rid of extra information and make the picture lighter without affecting its appearance.
In the case of a photo captured by a modern smartphone, there could be thousands of pixels in its width. This image can be of high quality, but it is too large for sending it via email. It is better to resize it before compressing.
It is possible to edit an image by removing unnecessary parts of it before resizing.
If you want to learn more about properly cropping images before resizing, you can read this detailed guide: https://www.saivionindia.com/blog/crop-image/
Using cropping, resizing, and compression together creates images that are easier to send while maintaining professional quality.
Best Practices for Sending Images Through Email
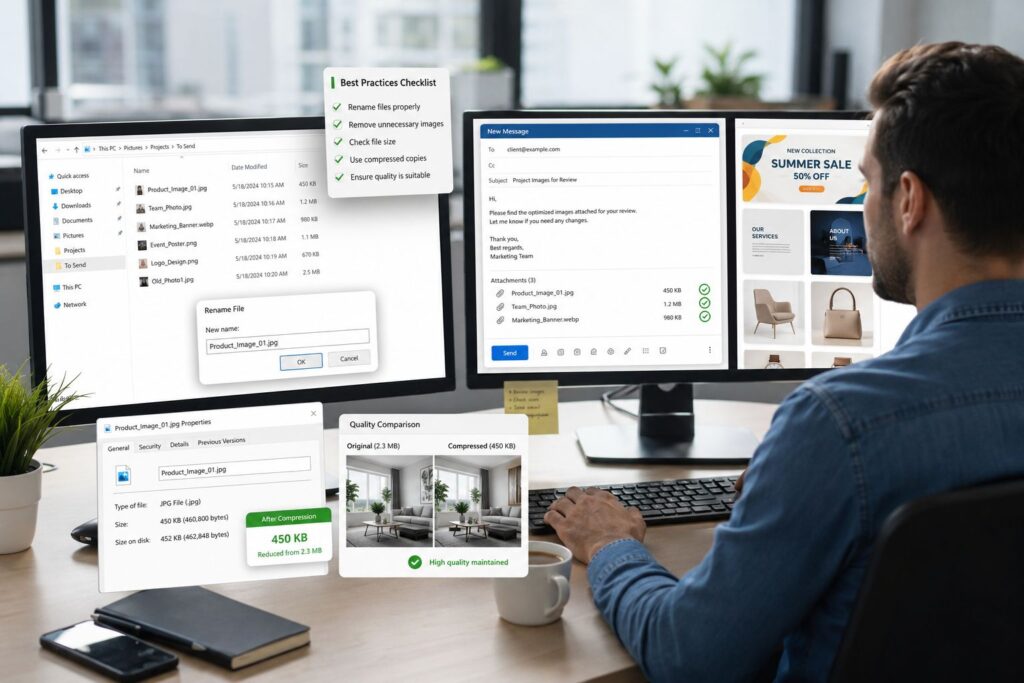
Preparing images correctly before sending them can make communication faster and more professional. Whether you are sharing personal photos or business-related images, optimized attachments create a better experience for the receiver.
Before attaching images to an email, consider the following:
- Rename files properly so recipients can understand the content.
- Remove unnecessary images from attachments.
- Check the final file size before sending.
- Use compressed copies instead of original files.
- Make sure the image quality is suitable for the purpose.
For businesses, this becomes even more important. Large product images, marketing graphics, and project files can quickly increase email size. Proper image optimization saves time for both the sender and receiver.
Conclusion
How to compress pictures for email is another way to learn how to send images more easily and quickly and get rid of potential attachment problems. It doesn’t matter whether you need to send your own photographs, pictures for work or anything else – knowing how to do it will make everything easier.
How to make pictures smaller for email and how to resize pictures for email will help you to create pictures which will be easy to upload, download and view. The most effective way is to use both resizing and cropping together with compression and not to lower the quality of the image excessively.
TAGS
